Overview Of A Electric Torque Wrench
Introduction
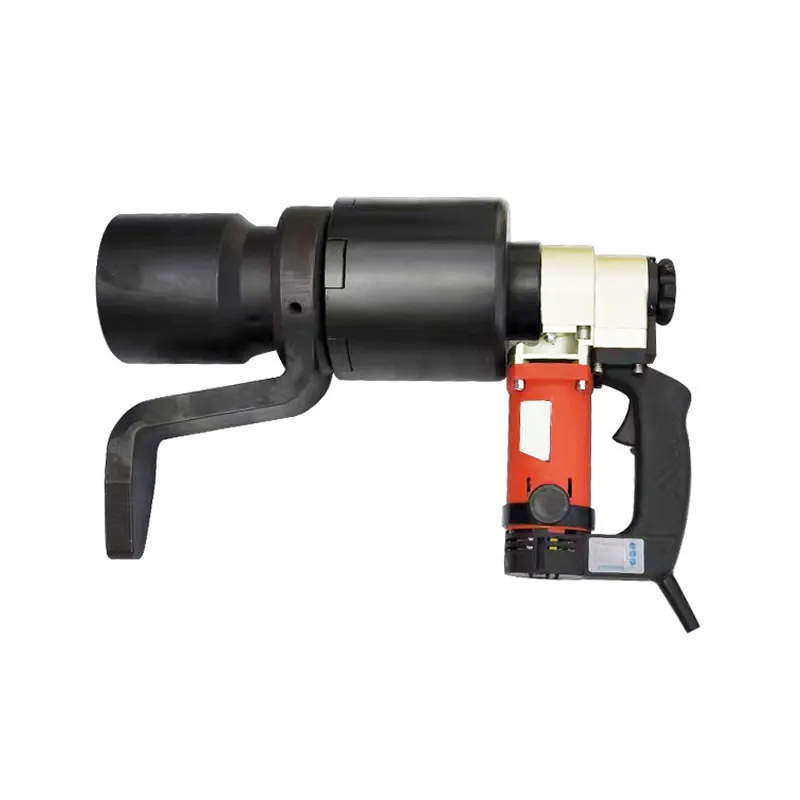
Electric torque wrenches are powerful tools used in various industries to achieve accurate torque application.
These tools provide precise control over tightening operations, ensuring that fasteners are tightened to
the specified torque requirements. In this comprehensive guide, we will explore the key aspects of electric
torque wrenches, including their functionality, usage, and working principles.
I. What is an Electric Torque Wrench?
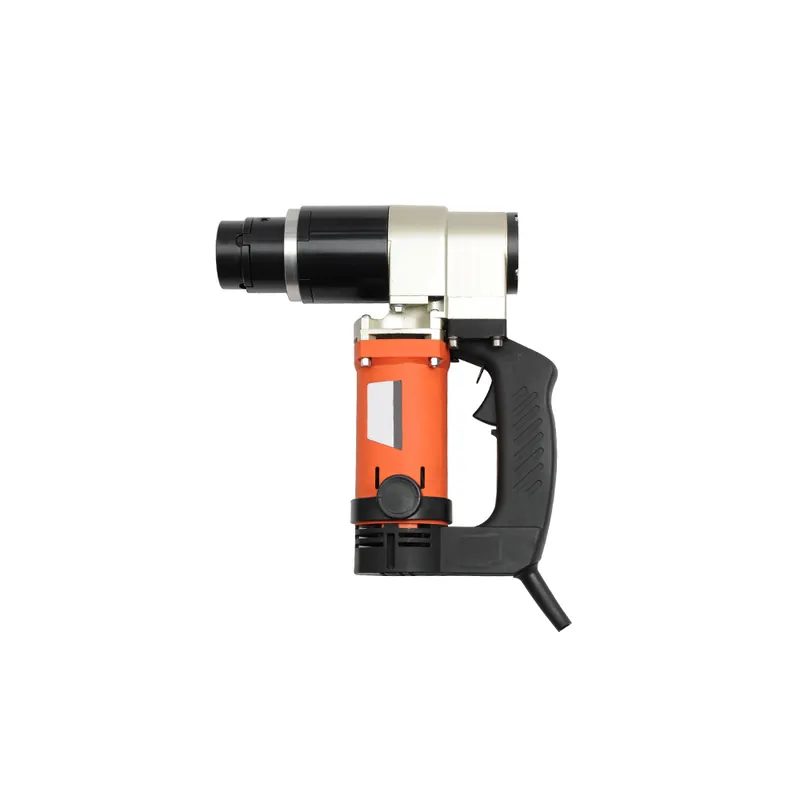
An electric torque wrench is a specialized tool used for precise and controlled tightening or loosening of fasteners,
such as bolts and nuts. It combines the functionality of a traditional torque wrench with an electric motor,
providing the user with enhanced torque application capabilities.
Unlike manual torque wrenches that rely on human strength and technique, electric torque wrenches utilize an
electric motor to generate rotational force, making the tightening process more efficient and accurate.
The motor is typically powered by a battery or connected to an electrical power source.
These tools are commonly used in industries such as automotive, manufacturing, construction, and maintenance,
where precise torque application is essential for safety, performance, and quality control.
Electric torque wrenches come in various types and sizes, including pistol grip, inline,
and angle designs, to suit different applications and access requirements.
II. How Does an Electric Torque Wrench Work?
1. Motor: The electric torque wrench houses an electric motor that converts electrical energy into mechanical motion.
When activated, the motor generates rotational force, which is transmitted through the wrench's gearbox to tighten or loosen bolts.
2. Control Mechanism: The control unit of the electric torque wrench is responsible for adjusting the power
output of the motor to achieve the desired torque. It allows the user to set the target torque value
and ensures that the wrench applies the correct amount of force during fastening operations.
3. Torque Measurement: The electric torque wrench incorporates a torque measurement system to determine
the resistance encountered during the tightening process. This system typically includes strain gauges,
load cells, or other sensors integrated into the tool. These sensors convert the resistance into torque values,
which are displayed on the wrench's screen or digital interface.
4. Gearbox: The gearbox of the electric torque wrench contains a set of planetary gears.
These gears help to increase or decrease the speed and torque generated by the motor.
The gearbox ensures the proper transmission of power from the motor to the
square drive or low-profile drive of the wrench.
5. Feedback System: The electric torque wrench provides real-time feedback to the user
through visual or auditory indicators. When the applied torque reaches the set torque value,
the wrench will provide a prompt on the display and may emit an audible signal,
indicating that the desired torque has been achieved.
III.How To Use an Electric Torque Wrench?
Using an electric torque wrench requires careful attention to detail and proper technique to ensure
accurate and effective torque application. Here is a step-by-step guide on how to use an electric torque wrench:
1. Pre-Work Preparations:
- Put on appropriate personal protective equipment (PPE) such as safety glasses and gloves.
- Inspect the electric torque wrench for any visible damage or defects. Do not use a damaged tool.
- Select the correct socket or bit that matches the size and type of the fastener you will be working with.
2. Set the Desired Torque:
- Refer to the torque specifications provided by the equipment manufacturer or engineering standards.
- Locate the torque adjustment mechanism on the electric torque wrench.
It may be a digital display, a dial, or a control button.
- Set the desired torque value by adjusting the torque adjustment mechanism to the required setting.
Ensure you are using the appropriate torque units (e.g., Nm, lb-ft).
3. Prepare the Fastener:
- Ensure the fastener and the receiving hole are clean and free from debris or obstructions.
- Insert the correct socket or bit onto the square drive of the electric torque wrench, ensuring a secure fit.
4. Position the Electric Torque Wrench:
- Align the socket or bit with the fastener, ensuring it is properly seated.
- Hold the electric torque wrench firmly, ensuring a comfortable and stable grip.
5. Apply Torque:
- Activate the electric torque wrench by pressing the power button or trigger, depending on the model.
- Slowly and steadily apply force in a clockwise direction to tighten the fastener.
Avoid sudden jerks or excessive force.
- Pay attention to the torque value displayed on the tool or the audible signals provided by the wrench.
- Continue applying torque until the electric torque wrench signals that the set torque value has been reached.
This may be indicated by an audible beep or a visual indicator on the tool.
6. Release Pressure:
- Once the set torque value has been reached, release
the pressure on the trigger or power button to stop applying torque.
- Remove the electric torque wrench from the fastener.
How to repair an electric torque wrench?
Repairing an electric torque wrench requires proper knowledge, skills, and tools.
It is recommended to consult a qualified technician or contact the manufacturer for assistance.
However, if you have a basic understanding of the tool and want to attempt repairs yourself, follow these general guidelines:
1. Safety Precautions: Before starting any repairs, ensure the torque wrench is disconnected from
the power source to prevent electrical shocks. Wear appropriate safety gear,
such as gloves and safety glasses, to protect yourself during the repair process.
2. Consult the Manual: Refer to the user manual provided by the manufacturer for troubleshooting tips
and repair instructions specific to your torque wrench model. The manual may include diagrams,
parts lists, and step-by-step instructions for common repairs.
3. Disassembly: Carefully disassemble the torque wrench, following the instructions provided in the manual.
Take note of the order and position of components to ensure proper reassembly later.
Keep track of any screws, bolts, or small parts and organize them for easy retrieval.
4. Component Inspection: Inspect each component for damage, wear, or signs of malfunction.
Check for loose connections, broken wires, or burnt components. If any parts are damaged or worn beyond repair,
they may need to be replaced with genuine manufacturer parts.
5. Cleaning and Lubrication: Clean all components thoroughly using appropriate cleaning agents and tools.
Remove any dirt, debris, or residue that may affect the performance of the torque wrench.
Apply lubrication to moving parts and gears as recommended by the manufacturer.
SAIVS:Electric Torque Wrenches
SAIVS has recently launched several electric torque wrenches, and our wrench has received recognition and praise from many customers.
If you are interested in purchasing, please feel free to contact us at any time!


